The Bowser San Francisco F-line PCC cars were introduced to the public in November 2009 in two versions, a powered version, 125XX and the souvenir versions, 127XX. The powered version was intended for operation and was equipped with the proven Bowser mechanism. Improvements to this durable drive included a dynamically balanced flywheel, additional motor isolation plus a circuit board equipped with the NMRA 8-pin plug along with exterior and interior lighting capabilities. The souvenir versions were intended for display only. They have the same body shell and windows as the powered version but only have a plastic floor and wheels. The plastic wheels on the souvenir units are HO scale but do not swivel so the souvenir versions can only be set on straight track.
At customer requests, we have developed a method to upgrade the souvenir units to operable unpowered models by replacing the plastic truck assemblies with two Bowser trailing trucks, which will swivel. When these trucks are installed the two versions are almost indistinguishable when no electrical power is applied.
II-PARTS NEEDED:
To accomplish this, you need the following items:
Two Bowser 1320 trailing truck assemblies*,
Four Bowser 1270 track brake assemblies*,
Two Bowser 256031 2-56 screws*,
Exacto or similar knife,
Small screwdriver,
Sanding stick or file,
Flat Black paint (i.e. Floquil F110010 Engine Black), and
Weathered Black paint (i.e. Floquil F110017 Weathered Black)
III-PROCEDURE:
1. The first step is to remove the plastic floor from the shell. Carefully remove the plastic floor from the souvenir unit by spreading the four clear window tabs that hold the floor to the body. Set the shell with window strips aside.
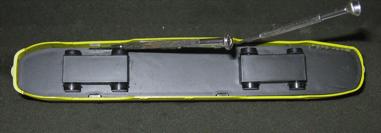
Figure A – Shell and Floor Assembled
2. Using an Exacto or similar knife, gently pry the plastic truck cover plate from the body. Note that it is secured to the floor with four small tabs, only one of which may be cemented. With careful and slow prying with the blade, the cover will be removed without cracking the floor.
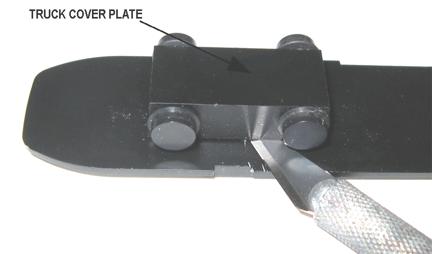
Figure B – Using knife to pry truck cover plate.
Note: The truck cover plate is secured by four tabs that extend into the floor. Do not be upset if you break one or more of them in removing the cover. That is probably the one that was cemented in place at assembly.
3. When both covers are removed, four wheel supports will remain, these must be removed and filed or sanded flush with the car floor to prevent interference with the soon to be installed trucks. Since the object is to have trucks that swivel, this step removes any obstacles to this.
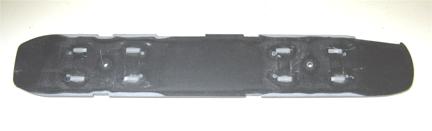
Figure C – Modified Floor before painting.
Note: At this time, you may want to airbrush or touch up the bottom of the floor with flat black paint. Airbrushing the top side of the floor would allow complete installation of an interior, which is not discussed here.
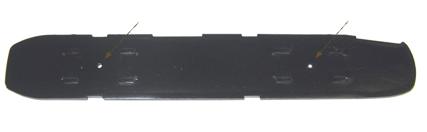
Figure D – Modified Floor after Airbrushing Bottom with Floquil Engine Black
4. The next step is to cut off the tabs of the brass power pickups, part #1256. Shown in the next photo is a complete 1320 trailing truck assembly (left) with two 1370 track brake assemblies installed, two 1256 brass power pickups with the lower portion painted with Floquil Weathered Black (center) and two 1256 parts with the power pick up tabs removed.
Note: You may find it advantageous to paint the visible sides of the 1256 part with either the same black paint or weathered black paint such as Floquil Weathered Black, F110017, to enhance the appearance.
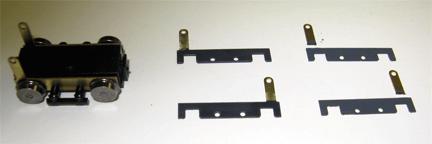
Figure E. Bowser Parts 1320 and 1256 (Unmodified and Modified)
5. There are two holes already provided in the floor for mounting these trucks. See the holes denoted by the arrows in Figure D. Using a 2-56 screw; simply insert the screw through the bottom of the truck into the hole already provided and secure both trucks to the floor.
6. Remount the floor into the shell. Push the floor only enough to snap into the clear retainers. Your car is completed.
IV- OTHER:
1. Custom Traxx has arranged all of the major parts that you need for this conversion in a single kit. Just notify them that you wish the 12700 Souvenir PCC Upgrade Kit. It is priced at $24.95 and includes all the items indicated by asterisks in paragraph II above. See the Custom Traxx catalog, Section V.
2. It is planned that a DCC ready power chassis will be available in late 2010 for the 127XX souvenir cars. Check the Custom Traxx catalog for availability. This chassis essentially converts the souvenir model to a powered model.
3. In the next photo is a powered 12557 San Francisco Muni Cincinnati PCC (left), our converted Souvenir 12757 San Francisco Muni Cincinnati PCC and in the background is a pre-production Souvenir 12752 San Francisco Los Angeles Railway PCC with the standard plastic wheels. These are shown on one of the latest modules of the Southern California Traction Club.
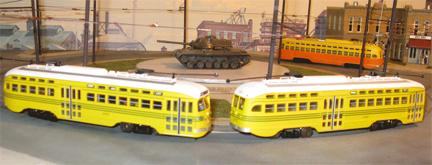
Figure F – Bowser PCC Car |